

For the most part microscopes are not hard to use. While there are a vast number of complexities and nuances in different techniques and applications in microscopy, the basic procedure for using the microscope is pretty much the same. Although we will get into much more detail into each of these steps, here are the high level steps to use a microscope:
- Gather the tools, safety material, and cleaning materials you will need to observe your specimen.
- Make sure a power outlet is within reach of your workstation. If you are using a battery powered microscope this will not apply.
- Ensure your slide and coverslip are clean.
- Ensure your specimen is available and ready to be transferred to the slide.
- Prepare your slide with the specimen and place the coverslip over the slide and specimen. This applies only if a coverslip is required.
- Lower the light intensity knob to the lowest power setting.
- Turn on the illuminator.
- Lower the stage to its lowest position.
- Engage the lowest power objective lens (scanning objective lens).
- Raise the condenser just below the stage aperture.
- Lock the slide into place by swinging the stage clip out and positioning the slide all the way back in the stage clip and then engaging the clip so that it clasps the slide against the stage.
- Use the lowest power objective to find the specimen.
- Rotate the nosepiece and engage the next higher power objective.
- Use the fine adjustment knob to bring the specimen in focus and adjust the light intensity, iris diaphragm and condenser height to form a resolved image.
- Re-center the specimen using the X-Y translational knobs.
- Repeat this process until you have reached the desired magnification.
The same way a guitar player would learn to position her fingers correctly, form a bar chord correctly, clean the guitar, re-string the guitar, and pick a guitar so to should someone learning microscopy. Whether you are a hobbyist or student there are some simple things you should know before you get started.
In this post we will go through the steps, procedures, and best practices for properly using a microscope. Throughout this post I will be referring to different parts of the microscope. If you are unfamiliar with the parts of a compound microscope, please see Parts of a Compound Microscope: Diagrams and Video. If you want to get this same microscope used in this video and in this post you can get it here on Amazon.
Preparation
Before even getting the microscope out of storage I always make sure I have everything I need to complete the observation. I go through the following checklist:
- Cleaning material – If you are planning on using oil immersion on a high power objective you will need to make sure that you have lens paper and cleaning solution. You will also need enough to clean the slide after observation. Deepening on the specimen you may also need additional cleaning material to clean your workstation.
- Safety material – If you are observing a specimen like bacteria that is potentially harmful you may need to wear gloves. If your specimen gives off harmful fumes, you need to ensure you have a respirator sophisticated enough to protect yourself from the potentially harmful emissions. In some cases you may also need protective eyewear.
- Specimen – Ensure your specimen is contained in such a way that it case be placed on the slide without harming the specimen, the slide, or yourself.
- Tools – Ensure you have the necessary tools needed to prepare the slide and manipulate the specimen if required.
- Slide – ensure you have a clean slide available with a clean coverslip. Once you have the clean slide and coverslip, prepare the slide with the specimen and place the coverslip over the slide if applicable.
- Available power outlet – Unless your illuminator is battery powered you are going to need to plug your microscope in. It’s not a good feeling to have everything setup and then realize that your power cord will not reach the outlet and you need to move everything over 10 feet to plug you microscope in.
Microscope Setup
Generally, you will need to pick up the microscope and move it to a workstation or position it for observation. To do this you need to make sure you are holding it using the arm and the base of the microscope. One hand should be grasping the arm and the other should be supporting the base of the microscope.
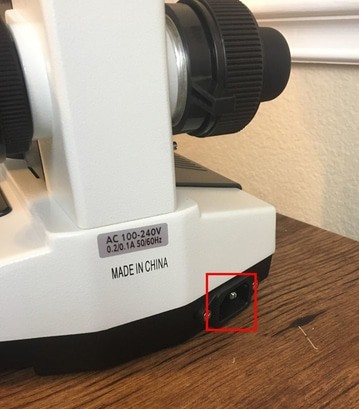
Unless you have a battery powered microscope, once you have the microscope positioned, you will need to plug the microscope in. The microscope power cord usually plugs into the back side of the base of the microscope.
Next ensure the light intensity knob or dial is set to its lowest setting and turn on the illuminator of the microscope. If your illuminator is using a halogen light source, turning it on with the highest intensity setting can damage the bulb.
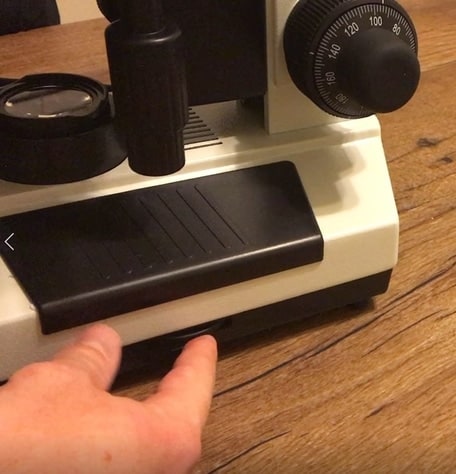
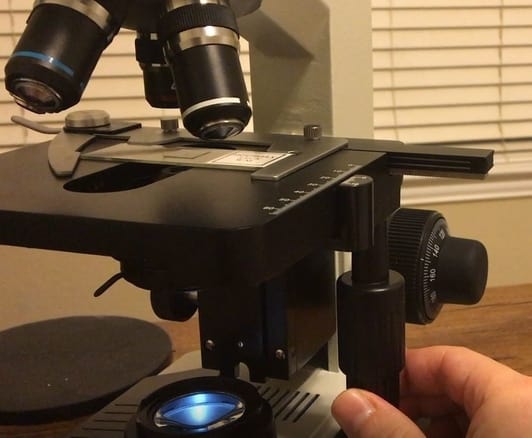
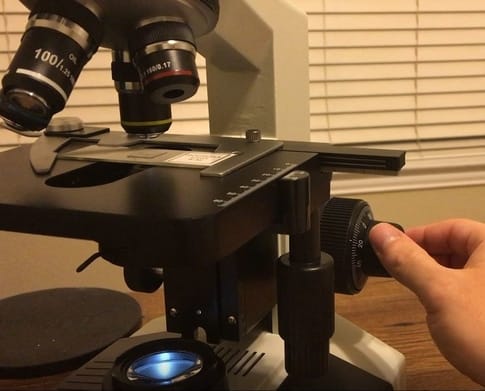
Make sure the stage is in the lowest position. To lower the turn the coarse adjustment knob counterclockwise until the stage reaches the lowest setting. If you are unfamiliar with coarse and fine adjustment knobs, please see Microscope Coarse Adjustment and Fine Adjustment: Explained.
Next engage the lowest power objective on the microscope. When you first look through the microscope you need to get a lay of the land so to speak and see which part of your specimen you want to magnify and observe.
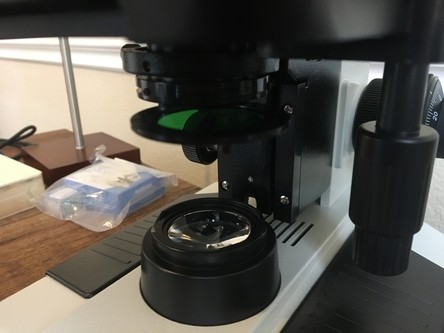
The lowest power objective is called the scanning objective lens because you are able to get a zoomed out view of the specimen and then once you have identified your area of interest you can engage the higher power objectives. Make sure the condenser lens is raised just below the stage aperture. You can use the condenser rack adjustment knob to raise and lower the condenser.
Setting the Slide
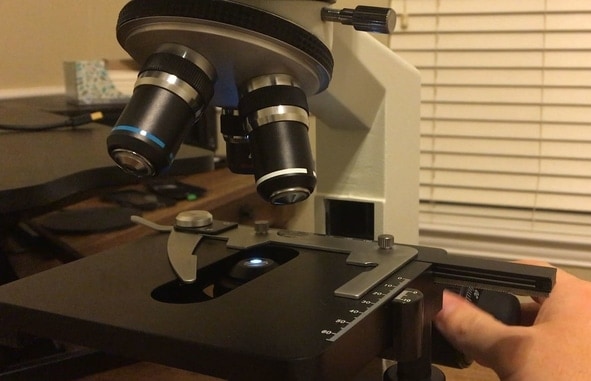
Once your slide is prepared and your microscope stage is at the lowest position you can set the slide. You do this by placing it on the stage, swinging the stage clip out and sliding the slide back into the groove of the mechanical stage. Then release the stage clip and this will clasp the slide inti place.
If you are using a simple stage which spring loaded stage clips you will need to press on the back of the stage clip to raise it and then slide one side of your slide underneath the stage clip. Then release the stage clip to clamp the slide into place.
Then do the same thing for the other side of the slide. If you are using a mechanical stage, you can use the X-Y translational knobs to center the slide over the condenser lens and stage aperture. If you are using a simple stage, you will need to use your fingers to slide the slide along the stage to center the specimen over the condenser lens.
Bringing the Specimen Into Focus
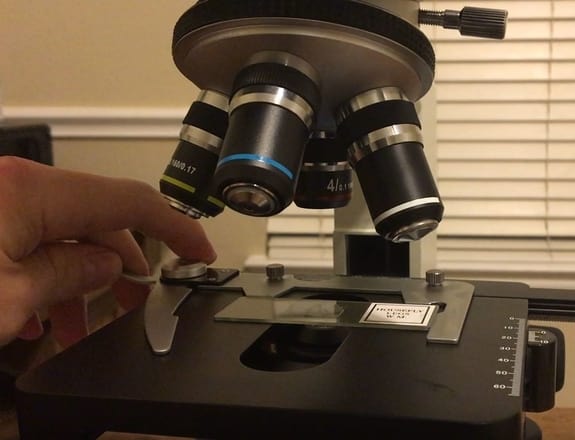
We start with the lowest power (scanning) objective in place. Look through the eyepiece or eyepieces if you have a binocular microscope. You should be able to identify the whole or at least a large portion of the specimen with this objective. Use the X-Y translational knobs to get the area of interest into the center of the field of view.
Next rotate the nosepiece to the next higher power objective. You will hear a click when the objective is in place. You will find that the specimen is now slightly out of focus. If you are currently on a 10X objective, you may be able to get away with using the coarse adjustment knob to get the specimen into focus. Otherwise you should use the fine adjustment knob to get the specimen into focus.
You may also find that the area of interest in the specimen is now not exactly centered in the field of view. Use the X-Y translational knobs to slowly center the area of interest again. Make sure you adjust the iris diaphragm to ensure that the numerical aperture of the cone of light that the condenser creates matches the optimal numerical aperture inscribed on the side of the objective.
Again, you can now rotate the nosepiece and engage the next higher power objective. This time you should use the fine adjustment knob to bring the specimen into focus. You may also need to re-center the area of interest of the specimen. You will again want to make sure the numerical aperture is adjusted to match the optimal numerical aperture suggested on the objective lens.
Troubleshooting
If you are struggling to focus the specimen there a few things you can try and troubleshoot before you throw in the towel.
Clean Your Objective
This is sort of a last resort type thing but if you are finding that the image is blurry no matter how you adjust the stage with the coarse or fine focus and nothing seems to change, it may be the case that you need to clean your objective lens.
This can happen if you forget to clean your objective after using oil immersion or if you accidentally touched the objective with your finger on the lens part of the objective. To clean the objective, you will need lens paper and cleaning solution.
Reposition Your Slide
In some cases, you may thing you have the specimen in the center of the field of view but when you change to a higher power objective the specimen exits the field of view. This can happen if you are dealing with a very small specimen.
You can try to switch back to the scanning objective lens and try to get your bearings so to speak and then center the specimen and begin the process on magnification over again.
Objective Not Fully Engaged
If you are not seeing the field of view at all or a dim light you may have not engaged the objective fully. Make sure the objective clicks into place and that you at least can see the field of view. The field of view is the circle that you see when you look through the eyepiece.
Filter Rack not Fully in Place
If you are using a filter, make sure you have completely swung the filter rack back into place. Sometimes the filter rack may look like it is fully in place but actually it is blocking a large portion of the light source. This will greatly reduce the visibility and image production capacity of the microscope.
Oil Objective
Typically, the highest power objective is an oil objective. If you have this objective in place and you are not able to achieve focus, make sure you are using oil on both the slide coverslip and the condenser lens.
The oil allows the numerical aperture to exceed 1.0 which is the limit of the refractive index of air. Generally, a 100X oil objective will have a 1.25 numerical aperture and this can only be achieved by using oil. If the numerical aperture does not match the optimal numerical aperture of the objective, you can get poor image quality.

Center Your Condenser
Check to see if your condenser is centered. If your condenser is not centered it will affect the ability of the objective lens to absorb the refracted light. You can use the condenser centering screws to adjust the condenser lens. You will need to close the diaphragm and look through the eyepiece to see when the condenser is centered in the middle of the field of view.
Different Eye Prescriptions
If you are using binocular microscope and you have different prescriptions on each eye you will need to focus each eye using the diopter ring.
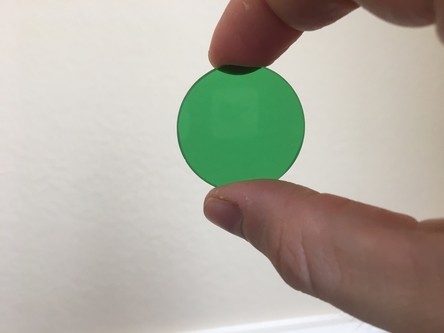
Try Using a Filter
If your objectives are achromatic objectives, you may be seeing some chromatic aberrations. Chromatic aberrations are basically where you image seems to have color bleeding which creates a distorted image.

Green and yellow filters can be used to manipulate the light wave being refracted and reduce the distortionary effect of some chromatic aberration. For more on filters see What is a Microscope Filter and Why is it Used?
Dirty Slide?
If the slide or coverslip is dirty or smudged it can disrupt the formation of a clear image. To clean your slide and coverslip you can use lens cleaning solution and lens paper.
Apply a drop or two of the cleaning solution to the slide and use lens paper, not kimwipes, to clean the slide and then use a dry piece of lens paper to dry the slide.
Slide Is Not Moving
If you have a mechanical stage and the slide is not moving, check to make sure the slide is positioned and clamped into place by the stage clip. Moving the X-Y translational knobs should move the slide along the X and Y axis when these are turned.
When You’re Finished
When you’re finished with your observation under the microscope it’s time to clean up and put away everything.
- Adjust the light source intensity to the lowest level and turn off the light source.
- Lower the stage to the lowest level using the coarse adjustment knob.
- Remove the slide and put the slide safely aside.
- Rotate the nosepiece and engage the lowest power objective.
- Secure the power cord.
- Cover the microscope.
- Clean the slide as described above.
Takeaways
Although there are complexities and nuances that can make the use of the microscope complex and sometimes difficult, the basics of using a microscope are relatively simple. I hope this explanation has given you the resources and confidence you need to start your exploration, experiment or leaning endeavor.