
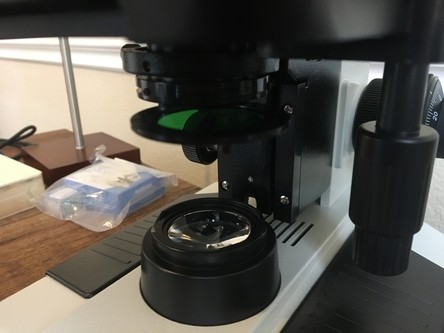
Microscopy filters are used to filter out specific wavelengths of light thereby increasing contrast, blocking ambient light, removing IR or UV radiation. Filters are generally fitted over the illuminating device below the iris diaphragm.
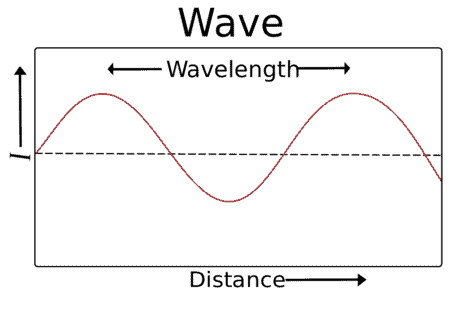
The illuminating device is the most crucial part of an optical microscope, as the “quality” of light it emits will determine the quality of the magnified image. Light beams emitted from the source travels as an electromagnetic wave, consisting of highs (crests) and lows (troughs). The distance between a crest and a trough is called the wavelength of light.
All microscopy enthusiasts need to understand the concept of wavelength as the resolution of a microscope is directly proportional to the wavelength of the light source. For example, in the visible light spectrum, violet light has the shortest wavelength. Therefore, a violet light source will produce the highest resolution.
Most microscopes come with a fixed light source that cannot be altered. Furthermore, depending on the sample being examined, you may need to adjust the wavelength of light.
There are an assortment of filters that are used in microscopy for various purposes, ranging from compound microscopes to confocal laser scanning microscopes. A few commonly used types are described below.
Type of Filters
Based on the wavelengths that are allowed to transmit through a filter, these can be classified as:
Band Pass Filters allow wavelengths within a specific range to pass through. These filters are defined by their start and stop wavelength, beyond which all wavelengths are blocked/cut off by absorption or reflection.
Long Pass Filters only allow wavelengths higher than a cut off value to pass through them. All wavelengths below the cut off value are absorbed or reflected back.
Short Pass Filters allow wavelengths below a cut off value to transmit through the device while blocking all other wavelengths.
Based on the method by which filters block the transmittance of light, filters can be classified in the following way:
Interference Filters/Dichroic filters reflect or destructively interfere with non-specific wavelengths to filter them out. These filters are glass films contain alternating layers of conductive or non-conductive materials of varying refractive indices.
Light passing from a lower refractive index to higher refractive index will be reflected away with only certain wavelengths constructively interfering to pass through. The pattern of interference is also dependent on the angle of the filter to the path of light. Therefore, the same filter can be used to filter a range of wavelengths by changing the angle of their installation. Depending on the coating, these filters can be designed to be short, long or bandpass filters.
Absorption Filters eliminate unwanted wavelengths by absorbing them. These are commonly dyed glass fragments/gelatine resins of varying thickness. The absorption of the filter is proportion to its thickness, colour and amount of dye. These filters are generally used to remove background noise. Unlike interference filters, absorptive filters are not angle sensitive; their absorptive properties do not change no matter which position they are fixed upon.
Based on the purpose for which filters are used, they can be classified in several different ways. Here we summarize only the most commonly used filters in the field.
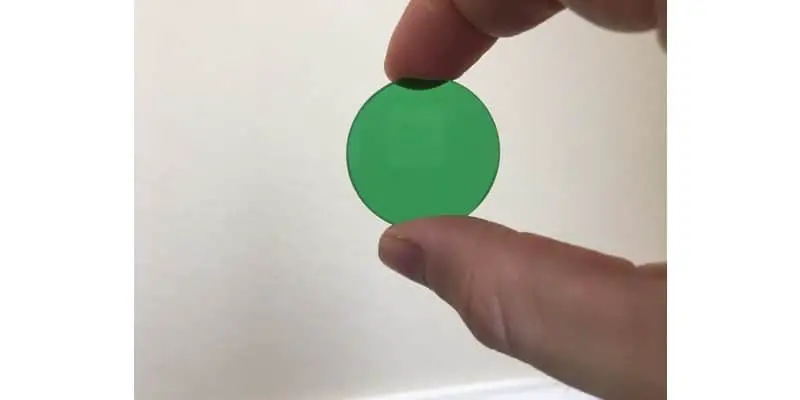
Color Filters are generally fitted onto compound microscopes to allow only light waves of a certain colours to pass through. The light source will emit light of all 7 colours- violet, indigo, blue, green, yellow, orange and red. Every colour will produce an image of different temperature, contrast and brightness. Colour filters will block certain colours from passing through by absorption or interference of specific wavelengths. They are generally made by dying glass/plastic or gelatine fragments.
Daylight Blue Filters: These filters absorb all the light between the yellow and red spectrum thus bringing the temperature of the image much closer to day light. By filtering out all the long wavelengths, blue filters improve the resolution of the image and its brightness. If your image appears yellowish with low brightness, the blue filter is right for you.
Yellow and Green Filters: These filters are used to reduce chromatic aberration and increase contrast. The objective lens corrects aberrations in yellow and green light better than other wavelengths. Therefore, these filters can be used to filter out all other colours in the spectrum and improve image quality.
Red Filters: Red light has the longest wavelength and therefore, the lowest resolution. However, red light efficiently reduces background noise. Therefore, in cases where the morphology is not important, red filters can be used for measurement of sample.

Fluorescence Filters refer to an assortment of filters that are used in fluorescence microscopy. In fluorescence microscopy, the sample you are examining may not be auto-fluorescent. Therefore, artificial dyes called fluorochromes/fluorescent probes are used to selectively dye parts of the specimen.
Fluorochromes absorb light from the illuminator and emit light of particular wavelength. A detector is used to collect and examine this emission. However, in some cases the sample’s natural autofluorescence results in background noise.
Filters can eliminate all non-specific wavelengths while isolating the excitation and emission wavelengths of the fluorophore. A good fluorescence filter should be able to increase brightness, reduce background noise and fluorophore noise.
The fluorescence filter system contains three main components:
An Excitation Filter filters the light from the illuminator before it transmits through the sample. This device ensures that the wavelength of light reaching the sample only falls within the excitation spectrum of the particular fluorophore.
Unwanted wavelengths may be absorbed or reflected based on the type of coating. It is recommended to choose an excitation filter that peaks as close as possible to the median wavelength in the desired excitation spectra. The optical density of the excitation filter will also determine the brightness of the image and darkness of the background.
A dichroic beam splitter is placed in the path of light to reflect light from the excitation filter onto the sample on the mounting stage. The mirror also blocks the unwanted light reflected back from the sample on to the eye piece. The device is generally placed at a 45o angle to the path of light.
The coating on the mirror has the unique ability to reflect one color (the light emitted from the emission filter) and reflect another color (the light reflected from the sample). Traditionally mirrors were used in this place, however, special coated glasses have been developed with a much greater efficiency for transmission and reflection.
The emission filter is placed between the sample and detector. It only transmits wavelengths within the emission spectra of the fluorochrome while blocking all other wavelengths. Depending on the coating, these filters can be designed to be short pass or long pass.
Long pass filters are chosen when the signal emitted from the fluorochrome is very weak. However, if you are examining a sample stained with multiple fluorochromes, a short pass filter is recommended to reduce background noise. The optical density and median wavelength properties of an emission filter should be based on the same guidelines for an excitation filter.
Heat Filters also called hot mirrors can be placed in the path of light to block infrared radiation by absorption or interference. These devices prevent the damage of fluorescence filters from heat associated damage.
Medium Grey Filters/ Neural Density Filters: These filters uniformly decrease incident light across the spectrum. These devices are therefore best used for adjusting exposure and brightness. They are generally fitted between the collector and the diaphragm.
Polarizing filters:
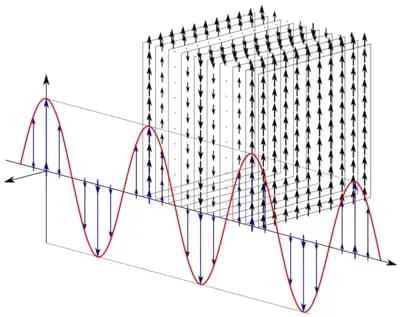
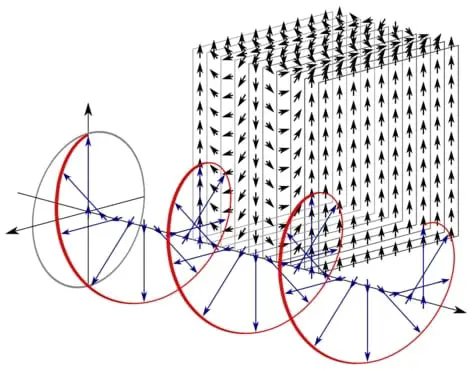
Photons in a light beam oscillate in multiple directions. A polarized light microscope uses a polarizer to filter out specific oscillations. Linear polarizer will limit oscillations to a single linear plane while a circular polarizer filters out two linear planes that are perpendicular to each other, the resulting electric field forming a circle.
How to Use a Filter
The filter is ideally placed in the path of light of a microscope. While some filters are angle sensitive (as described above), others can be placed at any angle.
In rudimentary microscopes, one can simply cut out a colour filter in the shape of the illuminating source and place it in the path of light.
However, most compound microscopes come equipped with a filter roundtable that contains several slots for standard filters. The roundtable swings out just below the iris diaphragm and the filter can be placed in and swung back into place.
To insert a filter you need to find the microscope iris diaphragm. If you do not know where that is please this article and if you do not know what an iris diaphragm does and you would more information please see this article.
Once you have found the iris diaphragm, on the bottom closest to the light source you will see a swingout compartment that you can swivel out with your finger.
Next, place the filter in the filter slot and swing it back into position. Make sure you lock it into position and it is not blocking any part of the iris diaphragm because this will block light which will diminish the quality of your image.
A fluorescence microscope comes equipped with multiple filters that can be chosen based on the fluorochrome being examined. It is also essential to regularly clean filters using compressed air, cleaning solvents containing alcohol and lint free swabs.
How Much Do Filters Cost?
- Colour filters for compound microscopes can be bought at $45 a piece. However, it is recommended that you choose filters that are designed to fit into your microscope’s slots.
- A polarizing microscope filter can cause up to $85, however most polarizing microscopes come pre-equipped with this filter.
- Fluorescence filters should be carefully chosen based on the common fluorochromes used for your specimens. An average fluorescence filter can cost up to $500.
- You can also check the price of this filter set on Amazon.
Takeaways
Microscope filters allow us to manipulate the light that passes through the microscope for many different purposes. If you are having trouble resolving an image and you have tried just about everything you can thing of, I would take a look at filters and see if changing the wavelength of light can make a difference.
I hope this article has given you an understanding of not only how and why you would use filters but also all the different kinds of filters that are used on very different microscopes for very different purposes.
References
- https://www.edmundoptics.com/f/fluorescence-filter-sets/13971/
- https://www.olympus-lifescience.com/en/microscope-resource/primer/techniques/fluorescence/filters/
- https://www.alluxa.com/optical-filter-applications/fluorescence-filters-microscopy-imaging/
- https://www.molecular.abbott/int/en/vysis-fish-knowledge-center/filter-and-microscope-basics
- https://www.microscopeworld.com/t-microscope_filter_info.aspx