I wash my hands religiously after going to the bathroom, being outside, or being at a public place like an airport or mall but sometimes I forget why I’m doing it and just do it out of habit. Most soaps are anti-bacterial so most of the time the reason we are washing our hands is to kill harmful bacteria that might make us sick.
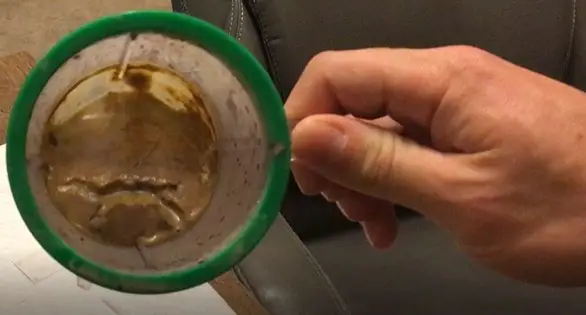
Walking by my wife’s office today I saw a smoothie that she had forgotten to clean out. It looked like it had been there for a couple of days because it was smelly and there were clearly some bacteria growing in it. Instead of immediately cleaning it out I thought it might be a good opportunity to see some bacteria under the microscope. Just to add a little to the observation, I thought it might also be fun to see what happens when we add disinfectant to the sample, all under a microscope.
In this article we will look at how I set this experiment up, we will learn a little bit about bacteria, understand the precautions to take, and see what happens when bacteria come into contact with disinfectant.
How to Get the Sample
In my case I already had a pretty good bacterial sample but you could easily culture some bacteria yourself using this guide. Before start preparing your slide, make sure you have the following supplies to complete the entire experiment:
- Q-tip (Cotton swab).
- Nitrile or Latex gloves.
- Microscope Slide.
- Slide Coverslip.
- Pipette.
- Tweezers.
- Cup of water.
- Small amount of disinfectant in a container.
- Lens paper.
- Lens cleaning solution.
The good part about this experiment is that bacteria are everywhere so you don’t necessarily need to go to culture bacteria to see it but I did find during the course of this experiment that if you culture bacteria and there are a bunch in a small area they are much easier to see. The list below is some, but definitely not all, of the common places where bacteria live.
- Remote controls.
- Phones.
- Kitchen counters.
- Standing water.
- Doorknobs.
- Toilet handles.
- Wet sponges.
- Raw foods.
So, once you have picked your place to take a sample really all you need to do is dip the q-tip in some water and swab the area to collect your sample.
How to Prepare the Slide
Once you have collected your sample on your q-tip swab you can lightly apply the swab to the center of the microscope slide.
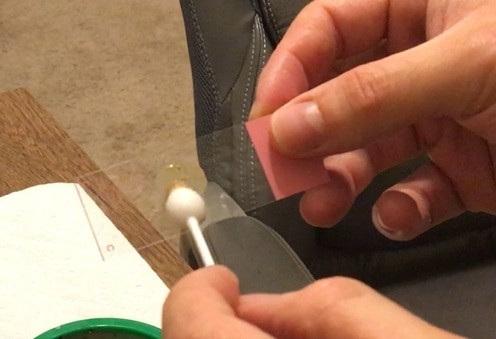
Next I would suggest adding a small droplet of water over the top of the sample if your sample is from a dry area. This will allow the bacteria to have a medium to move through. If you do not add water, you will still be able to see the bacteria. However, what I have found is that if the sample dries, the bacteria will be clumped up together and will not move or have very little movement depending on the bacterial sample.
Once you have your sample on the slide with the water droplet added, take you slide coverslip and, using the tweezers, lay one end of the coverslip over the slide and then slowly lower the other end of the coverslip done over the slide. If you lower the coverslip too quickly you will probably get air bubbles that will form. If that does happen it’s not a big deal, they just get in the way a little and something you have to look out for when you are trying to navigate you specimen under the microscope. The slide is now ready to go, and you can go ahead and place the slide on the stage and clamp the slide to the stage using the stage clip.
How to View Bacteria Under a Microscope
Bacteria is quite transparent, so it is very difficult to see using a standard brightfield microscope. There are a couple of things you can do that will make the bacteria more visible and create a much better image.
Methylene Blue Staining
Methylene blue staining is a technique used to highlight specimens or specific parts of specimens that may be difficult to see. In the case of bacteria, which are very transparent, the methylene blue stain works by binding to negatively charged parts of the cell like the nucleic acid. The effect of this is to stain the bacteria blue so that it is much easier to see under a microscope.
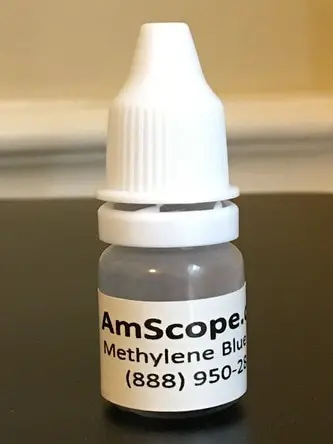
If you are going to use methylene blue stain you need to be very cautious because it is toxic if swallowed and can cause skin irritation, eye irritation and can stain your skin. Please use gloves and caution when working with this substance.
Phase Contrast
Phase contrast is another microscopy technique by which you can see very transparent specimens. Phase contrast works by shifting the phase of the light wave from what you would normally have under a brightfield microscope. This shift in phase causes there to be a distinct visual contrast that highlights features that would be invisible under standard brightfield microscopy.
The downside to this is that to use phase contrast you need specialized objectives that have a phase plate and you need a specialized condenser that contains a component called a condenser annulus that wok together to produce the phase shift that results in the desired contrast. These specialized components can be expensive and are only useful in cases where you need this kind of contrast. So, depending on how often you are going to use phase contrast, it may not be worth it to purchase these components to use phase contrast.
For more on phase contrast see Phase Contrast Microscopy: A Simple Explanation. If you are looking for a phase contrast kit that has all the parts you need to convert your microscope into a phase contrast microscope check out this kit on Amazon.
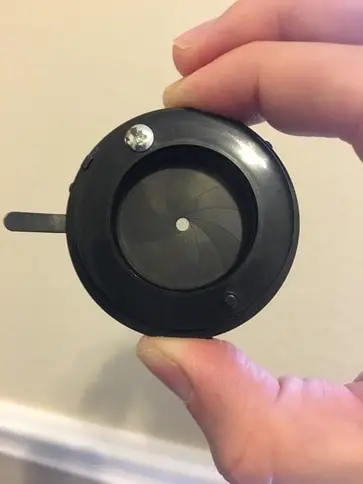
Close the Iris Diaphragm
This is option is probably the easiest option because it does not require any staining or specialized parts. If you close the iris diaphragm almost completely closed, you will get a slight contrast that will allow you to see the bacteria.
There is a tradeoff involved with this method though. If you close the iris diagram you are lowering your numerical aperture and on higher magnification objectives which require higher numerical apertures for optimal resolution, you will be sacrificing resolution for contrast. This is especially true if you are using a 100X oil objective that requires 1.25 numerical aperture. For more on how diaphragms work check out Diaphragm of a Microscope: What is it and how can it be used? If you don’t want to mess around with oil there are some 100X dry objectives that you could use that would be much easier and have a longer working distance.
How to Identify the Type of Bacteria
There is quite a lot that goes into identifying the type of bacteria that you are looking at. You will not be able to visually discern the type of bacteria. There are a few methods available but most of the advanced methods will not be accessible to amateur microscope enthusiasts and can only tell you very high level classifications of the bacteria. More advanced methods like DNA testing are required to identify the exact type of bacteria. Some of the identification methods are:
- Gram-staining.
- Shape recognition.
- Identification of a capsule.
- Bonding.
- Motility.
- Growth medium.
- DNA testing.
Some Quick Information on Bacteria
Bacteria are prokaryotic cells which just means they do not have membrane encased organelles. For much more on prokaryotes see this post.
Bacteria are not all bad. In fact, the majority of bacteria live in a symbiotic relationship with most other organisms. An example of this is, the bacteria that live in our gut plays a major role in food digestion and our body’s immune system response to harmful organisms.
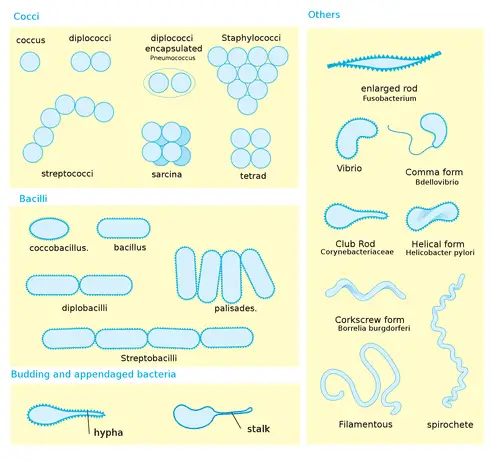
Bacteria can be classified into broad classifications and narrower subclassifications and then further to the specific type of bacteria which are too numerous to list here.
Classification and subclassifications of bacteria by shape can be broken down in the following way:
- Circular
- Diplo – (pairs)
- Strepto – (circular chain shape)
- Staphylo – (circular clusters)
- Rod-shaped
- Coccobacilli – (oval shape)
- Streptobacilli – (rods in chains shape)
- Mycobacteria
- Curved Forms
- Vibrio – (curved chains shape)
- Spirilla – (coil shape)
- Spirochete – (spiral shape)
- Other
- Helicobacteria – (helical shape)
- Corynebacteria – (club shape)
- Streptomyces – (filamentous fungi shape)
Some bacteria require oxygen to survive and these are called Aerobic. Other bacteria, far from needing oxygen to survive, if exposed to gaseous oxygen will die. This type of bacteria is known to be Anerobic.
Some bacteria are heterotrophic, meaning they require other organic compounds as a means of gathering energy. Other bacteria are autotrophic and do not require other organic compounds. Instead these bacteria gather energy from light like a solar panel or from chemical reactions in their surrounding environment.
Bacteria are extremely diverse and even with complex DNA testing and genome sequencing scientists are not able to confidently say that all bacteria on earth have been identified.
What is Disinfectant?
A disinfectant is just a chemical that is applied, usually to a surface of some sort, to kill microorganisms or other living things. They work by disrupting certain cell functions or damaging the cell. There are several different types of disinfectants:
- Quaternary Ammonium Compounds.
- Chlorine Compounds.
- Alcohols.
- Aldehydes.
- Iodophors.
- Phenolic Compounds.
- Hydrogen Peroxide.
The particular type I chose was a quaternary type of disinfectant the brand/product is Lysol disinfectant wipes. Lysol disinfectant wipes ingredients according to the material safety datasheet are:
- Ethanol.
- D-Glucopyranose.
- Oligomeric.
- C9-11-alkyl glycosides.
- Quaternary ammonium compounds.
- Benzyl-C12-16-alkyldimethyl.
- Chlorides.
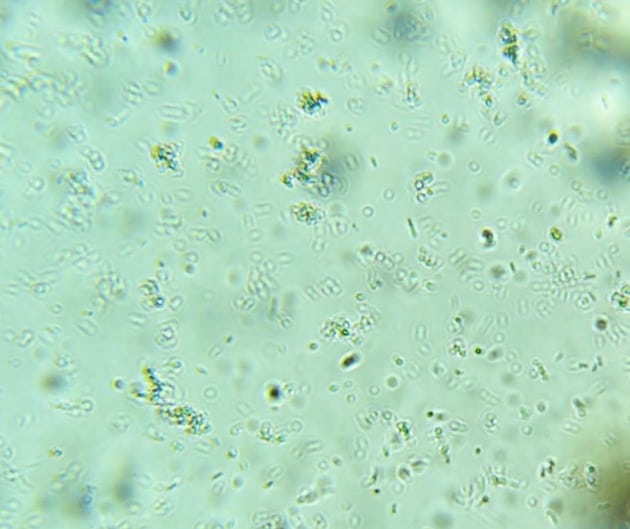
Bacteria vs. Disinfectant: What Happens?
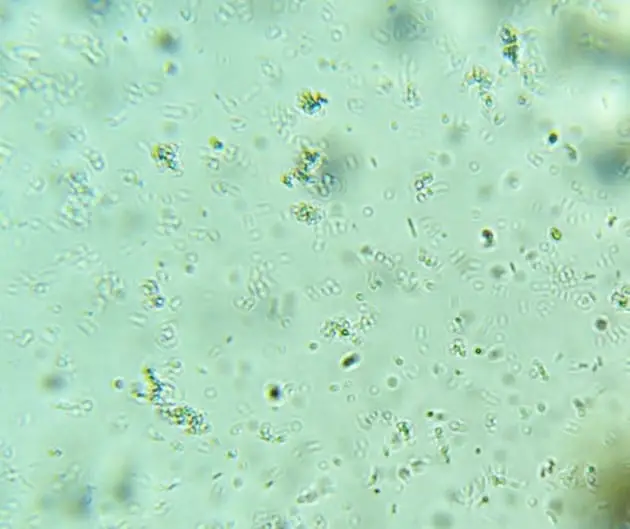
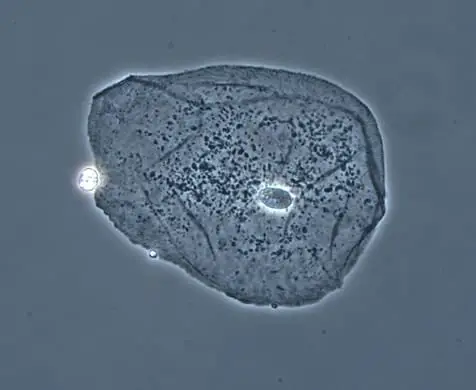
What we observed under the microscope was a very lively and rapidly moving group of bacteria and then once disinfectant was applied to the sample, we saw very little movement if any at all.
It was difficult to fully see the effect because adding the disinfectant droplet also disrupted the sample a bit causing some organic debris from the old smoothie to be kicked up and swirled through the sample.
Despite the debris, the bacteria that we did observe after the disinfectant was added did seem to be motionless indicating that the disinfectant had done its job.
Clean Up
When you’re done observing the bacteria under the microscope we need to clean up. You want to make sure that you handle your specimen with care and ensure you wash your hands thoroughly to make sure you do not come into contact with your bacterial specimen.
- Lower the stage to the lowest position.
- Engage the lowest power objective lens.
- Remove the slide from the stage.
- Take the slide and while wearing gloves or using tweezers remove the coverslip and rinse the coverslip in the sink.
- Next rinse the slide in the sink to remove the stain.
- Next clean the slide with an anti-bacterial soap and completely rinse the slide and coverslip.
- Use lens paper and the objective lens cleaning solution to wipe the slide and coverslip until dry.
- Put the slide aside and wash your hand thoroughly.
- Now you can put away and cover your microscope.
You can also clean and disinfect any of the other tools that may have come into contact with the stain or bacteria.
Takeaways
The observation was very cool. I wasn’t sure if I would be able to see the bacteria very well because of their transparency but it turned out that I was able to get a decent image by closing the iris diaphragm. As a kid bacterium was almost like this imaginary thing that you couldn’t see but people and books told you they were there.
I think seeing bacteria under a microscope right in front of your own eyes gives you a grounded perspective and more appreciation for these microorganisms that are all around us.
References
- https://pubchem.ncbi.nlm.nih.gov/compound/Methylene-blue
- https://serc.carleton.edu/microbelife/research_methods/microscopy/gramstain.html
- https://courses.lumenlearning.com/boundless-microbiology/chapter/methods-of-classifying-and-identifying-microorganisms/
- https://www.nycoproducts.com/resources/blog/types-of-disinfectants-how-to-make-the-best-choice-for-your-facility/
- https://micro.magnet.fsu.edu/cells/bacteriacell.html
- http://www.scielo.br/scielo.php?script=sci_arttext&pid=S1413-86702012000500011