If you’ve used a microscope before you have probably see “100X” or “400X” or heard people talk about magnification, but what does that actually mean in the context of a microscope?
Microscope magnification is the microscope’s ability to enlarge an image of an object through a series of lenses to a size multiple times larger than the actual size of the object. To calculate the magnification on a microscope multiply the magnification power of the eyepiece you are using by the objective currently in position.
Magnification = Eyepiece Magnification X Objective Magnification
Microscopes magnify or enlarge the image under inspection and enables the human eye to see things we would never be able to see. Scientists in a number of disciplines utilize microscopes to conduct research, study the movement and mechanics of microscopic organisms, and even in technology to build microscopic circuits.
How Magnification Works
When your eye perceives an image through a lens what is actually happening is refracted light that passes through the lens projects a kind of virtual image that has the effect of enlarging the object under inspection. So really what this means is that when you are looking through your microscope you are not seeing the “real” specimen you are seeing a reproduced and enlarged image of the specimen.
The images below should help you visualize this process.
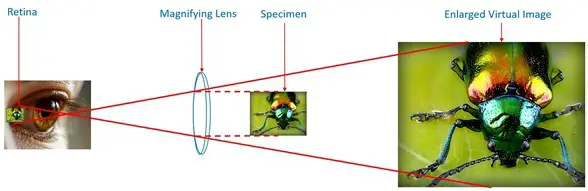
Modern compound microscopes contain an eyepiece, an objective, and a condenser lens and together these lenses work to refract the light that enters our eye and serves to enlarge the specimen under inspection. In fact, the objective lens has within it, several compounding lenses that contribute to higher and higher magnification powers. If you are not familiar with these terms please take a look at my article called Parts of a Compound Microscope: Diagrams and Video to familiarize yourself with the anatomy of a compound microscope.
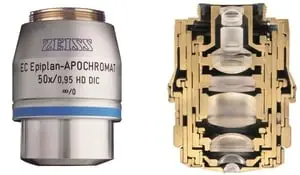
The image below shows a view inside an objective lens. You can see how all the lenses combined are used in the same refractive process as a single lens to produce a highly magnified image.
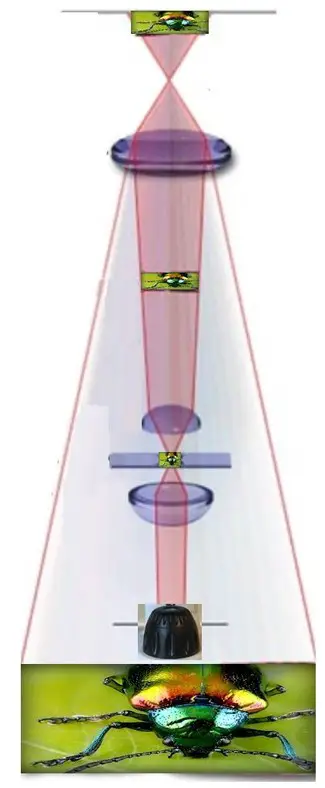
The magnification process starts off with the light source emitting light up through the condenser. The condenser lens focuses the light into a cone of light that is then passed through the specimen.
The objective lens then gathers the light that has been passed through the specimen and projects an image in the body tube. The eyepiece, being further away from image the objective lenses has projected, is able to further magnify the image and the eye of the person using the microscope sees this secondarily magnified image.
How to Find Magnification on your Microscope
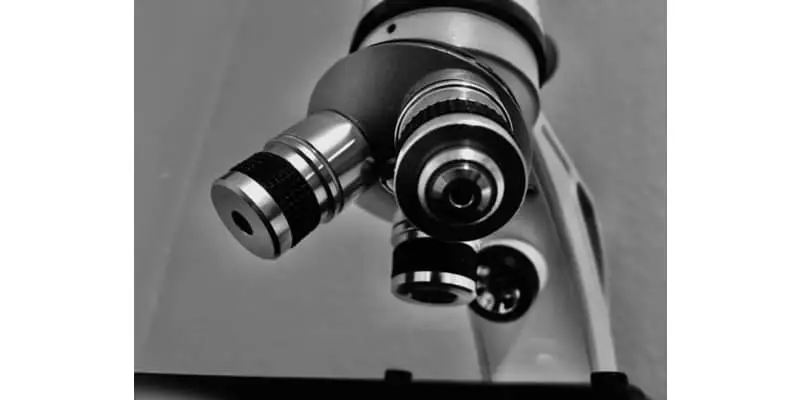
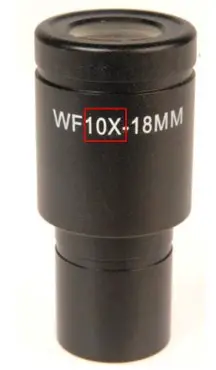
Magnification markings can be found in two places. The first is on the eyepiece. The eyepiece is the lens that you will look through and is placed in the eyepiece tube. The eyepiece magnification is usually etched or written in white lettering on the side of the eyepiece.
The objective lens magnification power is usually displayed prominently as a number and then an “X” or the number before the slash. The objective lenses are also color coded. Red is the lowest power, yellow the next highest power, and blue is the highest power on a microscope with three objectives.

Limits to Magnification (Empty Magnification)
If you have your microscope out and you are trying to look at something with your highest objective lens and your highest power eyepiece and you are not able to see anything clearly you may be wondering if there are limits to magnification. The answer is yes.
Just like a camera, a microscope also has the concept of resolution which just means the ability to resolve details of the subject under examination. Each objective on the microscope has a defined minimum and maximum magnification necessary to achieve for the details of a specimen to be resolved. The numerical aperture of the objective is what defines the resolution of the objective lens. If you increase the magnification beyond what the objective lens can resolve you will end up with “Empty Magnification”.
You can perform a simple calculation that can tell you before hand what the highest magnification levels will be so you can avoid empty magnification.
To find the minimum useful magnification for an objective lens multiply 500 by the numerical aperture.
Minimum = 500 X Numerical Aperture of the Objective
To find the maximum useful magnification for an objective lens multiply 1000 by the numerical aperture.
Maximum = 1000 X Numerical Aperture of the Objective
The chart below will give you a matrix of the range of useful magnifications for each objective lens and eyepiece lens magnification combination.
| Objective Lens (Numerical Aperture) |
10x |
12.5x |
15x |
20x |
Min and Max Magnifications |
|---|---|---|---|---|---|
| 2.5X (0.08 NA) |
50X | 40X – 80X | |||
| 4X (0.10 NA) |
60X | 80X | 50X – 100X | ||
| 10X (0.25 NA) |
125X | 150X | 200X | 125X – 250X | |
| 25X (0.40 NA) |
250X | 312.5X | 375X | 500X | 200X – 400X |
| 40X (0.65 NA) |
400X | 500X | 600X | 325X – 650X | |
| 60X (0.85 NA) |
600X | 750X | 425X – 850X | ||
| 100X (1.25 NA) |
1000X | 1250X | 625X – 12500X |
Highest Magnification Levels
Typically, the standard light microscope will max out at about 1,500X magnification and the electron microscope will be able to achieve 200,000X magnification.
To put that into perspective the human eye can see things down to single strand of hair, the thickness of which is about 0.065 millimeters. A light microscope can see things down to about 0.002 millimeters and an electron microscope can see things down to about 0.0000001 millimeters. Below is a chart to give you a sense of the range and scale of the different microscopes.
| Magnification Specrtum (Meters) |
Viewing Device | Example |
|---|---|---|
| 1 | Human Eye | Hight of a child |
| 0.1016 | Human Eye | Width of a human hand |
| 0.022225 | Human Eye | Width of a finger |
| 0.000065 | Human Eye | Thickness of human hair |
| 0.0000062 | Light Microscope | Size of red blood cell |
| 0.000002 | Light Microscope | Size of a bacterium |
| 0.0000004 | Electron Microscope | Size of a Virus |
| 0.000000002 | Electron Microscope | DNA Molecule |
| 0.000000001 | Electron Microscope | Glucose Molecule |
| 1E-10 | Electron Microscope | Atom |
Working Distance
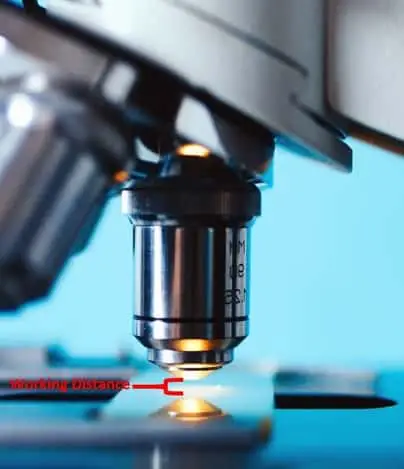
As the magnification of the objective lens increases the distance between the front lens of the objective and the coverslip on the slide which covers the specimen also decreases. The distance between the coverslip of the slide and the front lens of the objective is called the working distance. This inverse relationship basically means as you increase the magnification you will need to get the objective lens closer and closer to the specimen to achieve focus.
As you can imagine it is highly desirable to have an objective with higher working distances because the closer the objective gets to the slide the higher the chance there is of damaging the objective. However most quality objectives are spring loaded and will retract as the objective lens comes into contact with the slide. Although objective manufacturers work to increase the working distance on higher power objectives, working distance is constrained by the numerical aperture of the objective.
Wet (immersion) objectives also have a constrained working distance because in order for the objective to benefit from the increased refractive index that the wet medium provides, it must stay in contact with the liquid which often means quite small working distances.
In practice having a larger working distance can help when examining specimens through thick glass, a thick cover slip, or cases where the specimen must remain in high heat or emits toxic vapors.
Takeaways
In this article we have seen how magnification works, how to determine useful magnification, and much more. Magnification is a complex optical phenomenon and allows us to see so many incredible organisms and minute details of the physical world.
With the topics we have covered in this article you should have a working knowledge of magnification and the practical knowledge to apply it to microscopy and avoid time consuming pitfalls like empty focus.
References
- https://www.olympus-lifescience.com/en/microscope-resource/primer/anatomy/magnification/
- https://www.edmundoptics.com/knowledge-center/application-notes/microscopy/understanding-microscopes-and-objectives/
- https://www.microscopyu.com/microscopy-basics/useful-magnification-range
- http://www.physics.emory.edu/faculty/weeks/confocal/resolution.html
- https://www.microscopeworld.com/t-microscope_resolution.aspx