
Technology advances faster every day. A generation ago, computer systems the size of a modest house weren’t half as powerful as a cellphone that can fit in your pocket today. The latest phones can be everything from your sound system, to your game console, to your high-powered microscope.
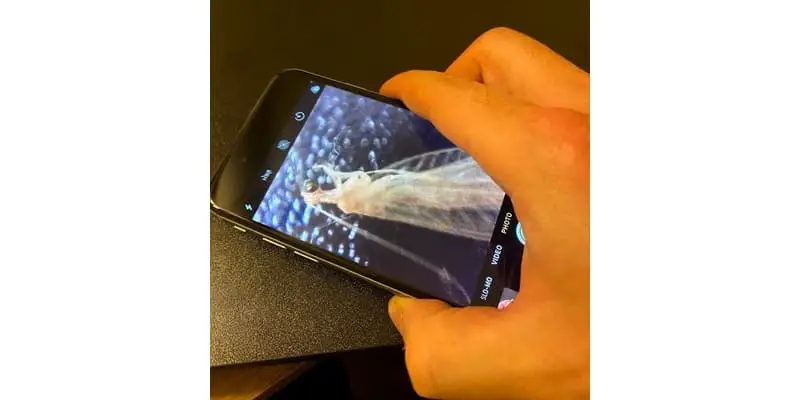
You can learn how to make an iPhone microscope in minutes, using parts that you may already own or can purchase for very low cost, like a glass bead or the lens of a laser pointer which just needs to be affixed over the iPhone camera lens. These devices can reach up to 400x magnification and view objects as small as paramecium and because it is an iPhone, you can take video, capture pictures, and much more!
Most people do not realize they already walk around every day with a useful microscope in their pockets. There are two ways to create a microscope with little more than your iPhone. This article will discuss those ways, what microscopes are used for, the limits of traditional microscopes, and why you should use an iPhone microscope.
The Laser Pointer Microscope
For the laser pointer iPhone microscope method, you will need:
- An iPhone – Almost half of all smartphone owners in the United States have an iPhone, so the chances are good that you already have this critical piece. You might even be reading this article on one right now. The high-resolution camera, usually reserved for selfies and must-see Instagram posts, is the main piece of this puzzle. If you don’t you could pick one up easily and quickly here on Amazon.
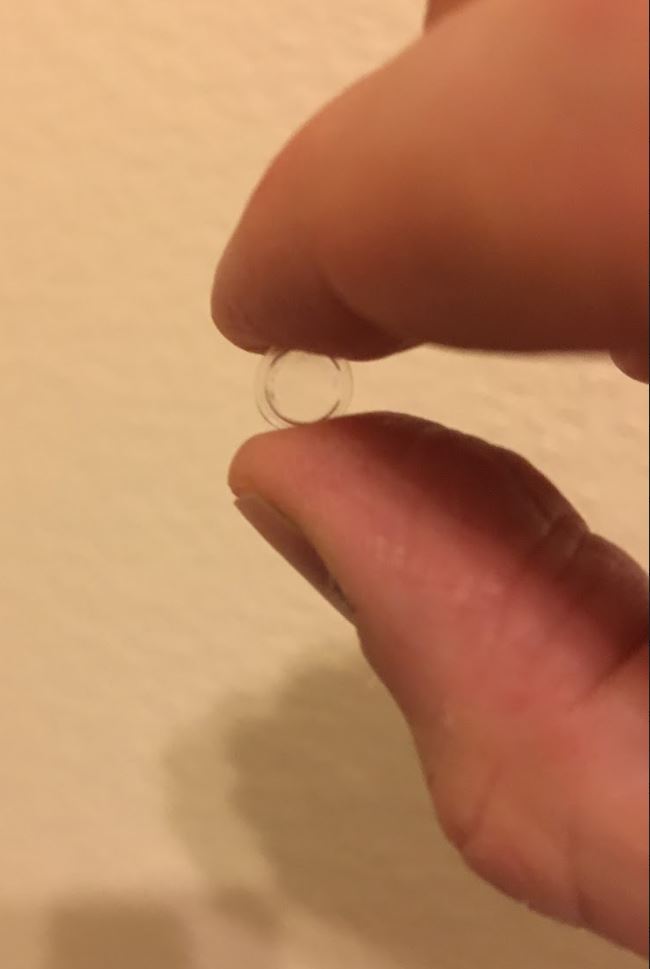
- A laser pointer – Laser pointers work by focusing light into a small point with a lens and then projecting it over a long distance. An inexpensive option is best as you only really care about a small part of the device, and the lenses of even dollar store models will work just fine. In fact, some of the cheaper simpler models are better because they disassemble much easier. You can get one of these at any office supply store.
Remove The Laser Pointer Lens
For most laser pointers, the lens can be removed by following these instructions:
- Unscrew the front piece of the laser pointer.
- Behind that, you will find a small metal cylinder capped by a black plastic “donut.” Remove this with tweezers, if you have them.
- Unscrew the black plastic “donut.”
- The lens is no longer secured, set it aside.
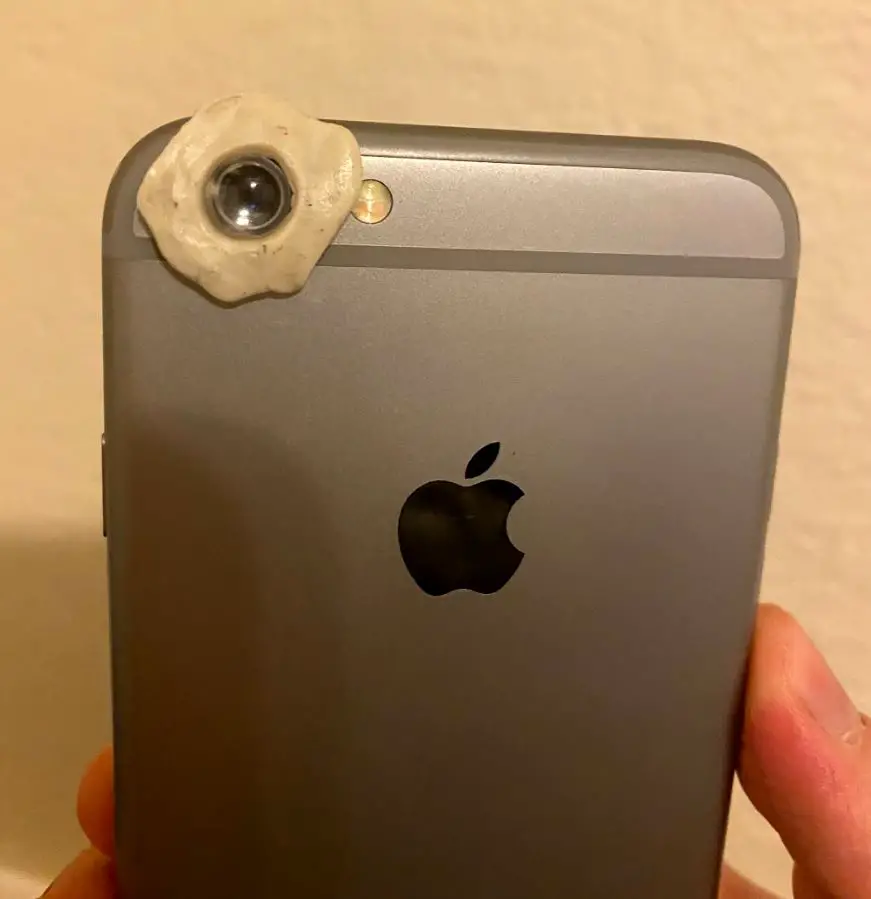
Remember, the lens is both small and fragile. Be careful when you handle it and try not to touch it with your fingers because it can leave smudges and fingerprints which can diminish the quality of the resolution of your iPhone microscope.
Make a Lens Holder
Now that you have your lens, you might look silly, trying to hold it in front of the camera with your fingers. You can keep the lens in place with something as simple as poster puddy that you would buy at a craft store.
- Open the puddy and pinch off a small piece of the puddy.
- Roll it around until it is long and thin.
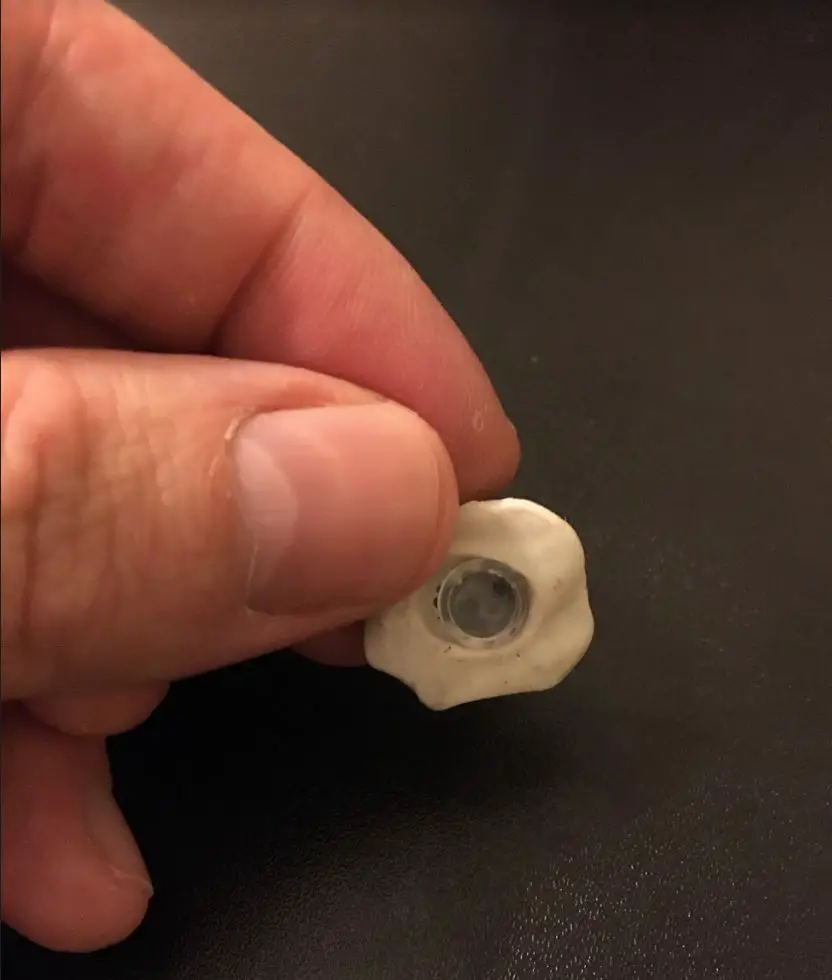
- Now connect the two ends of the rolled out putty to make a circle.
Put the laser pointer lens in the center of the putty ring and gently squeeze the sides of the putty against the lens. Make sure the putty is not covering the lens. The putty should only be touching the outer most part of the laser pointer lens.
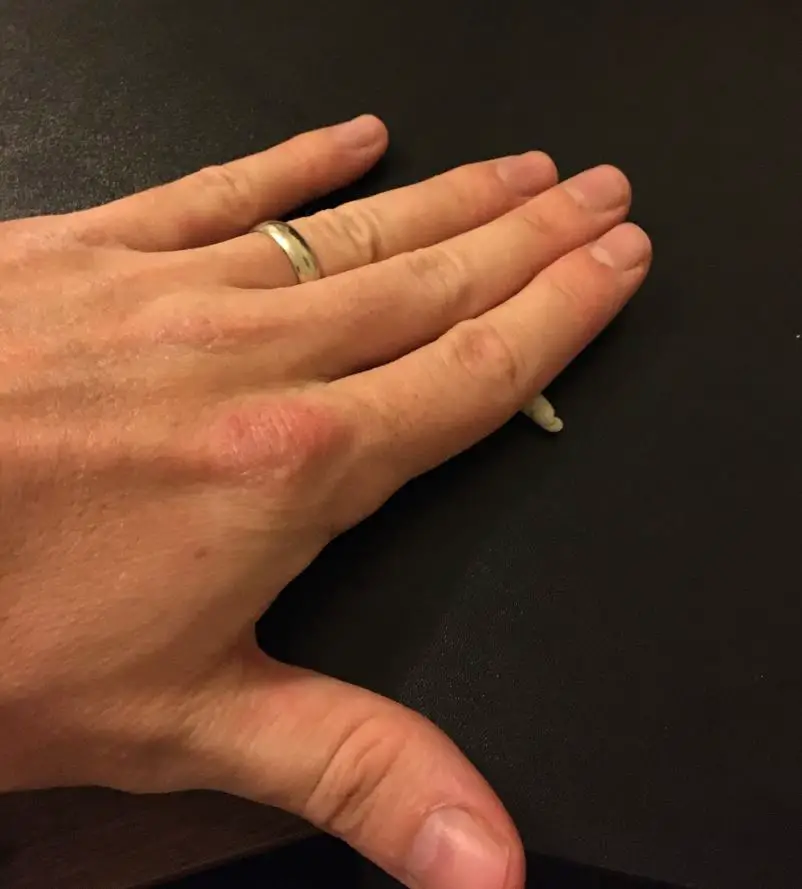
Attach the Laser Pointer to Your iPhone
Now that you have your laser pointer secured in the putty the next the to do is to attach it to your iPhone. Take the putty rung with the laser pointer lens in the center and place it directly over the iPhone camera lens and then gently mash the putty around the sides. It is important here that you do not press the putty too hard because eventually you will want to convert your iPhone microscope back into a normal iPhone and if you putty is pushed too hard against the iPhone there may be small annoying remnants where the putty once was.
The Glass Bead Microscope
The glass bead microscope was developed by scientists at the Pacific Northwest National Laboratory. This extremely simple microscope can reach 1000x magnification.
For the glass bead method, you will need:
- An iPhone
- A glass bead – Small, clear glass beads are inexpensive and can be purchased by the thousands online. Because of the low cost and the fact that even slight imperfections in the glass can ruin them as microscope lenses, it’s best to get several. The bead’s diameter decides the magnification, with your choices being .5, 1, and 3.5mm beads.
Purchase or Build a Holder
You can stay just as low tech as the previous design by using poster putty to attach the bead to your camera, or you can have a tiny microscope 3D printed to mount onto your iPhone. The team of scientists at the PNNL was kind enough to design these microscopes and provide the files to the public at no cost. If you don’t own a 3D printer, you can order the unit from a minimal cost printing service.
Attach the Glass Bead Lens
Just like the laser pointer model, attaching your glass bead lens is as simple and easy as using something like poster putty. If you are looking for something sturdier, 3D printed mounts are no thicker than the average phone case and are made to clip to the side of your device.
Enhancing a DIY iPhone Microscope

Making a microscope with your iPhone is fun and easy. If you want to see crystal-clear images, you only have to spend a few minutes and grab some essential items. Creating the invention is half of the excitement, but let’s break down three ways that you can upgrade the experience:
- Put your iPhone into timelapse mode to watch the cells change. Leave your iPhone over a live specimen, turn it on the timelapse setting, and leave it overnight. Make sure there’s enough light to illuminate the microscope. In the morning, you can view how the specimen has changed.
- Use various filters to brighten or change the image’s color. Modern smartphones come with loads of filters and coating options that you can use to get a clearer image. When you’ve found the one that you like, take a picture. Feel free to edit images with the stock iPhone image-editing app.
- Switch to the iPhone’s Pro Photo mode. You can change the light exposure, adjust the focus, and play with multiple options to get the perfect image of the object that you’re viewing. Consider using an app, such as SnapSeed, to edit your photos and clarify the images or videos.
As you can see, there are plenty of ways to have a blast while using your iPhone as a magnifying glass. With all of the newest updates, you can always get a better image.
Make an Optional Stand
When zoomed in so closely, even the slightest movement can throw you wildly off course. If you’re like the rest of us and do not have the rock-steady hands of a world surgeon, you will benefit from making a stand to hold your iPhone in place. These stands can be as simple or elaborate as you want them to be. You can get this tripod stand or similar ones on Amazon.
You could use a stack of textbooks or an entire plexiglass stand specially meant for holding an iPhone in place.
You can also use an iPhone tripod and simply bend all of the legs all the way out so that your iPhone microscope is hovering over your specimen horizontally.

Takeaways
While traditional microscopes can cost hundreds or even thousands of dollars, an iPhone microscope can do the same job for less. Without tools, training, or expertise, you can make a versatile microscope anywhere. The parts required to build an iPhone microscope are so inexpensive they can even be thrown away after use.
An iPhone microscope could be a good way to get a son, daughter, nephew, or niece interested in microscopy. Once the microscopic world becomes visible and a child sees some amazing creatures and details that they never knew were there, you may spark an interest, not only in microscopy but in other avenues of science. Go out and try it today!
References
- Pacific Northwest National Laboratory (PNNL): Homepage
- PNNL: Want to Print Your Own Cell Phone Microscope for Pennies? Here’s How.
- PNNL: PNNL Smartphone Microscope How-to Guide
- PNNL: PNNL Smartphone Microscope
- Microbiology: Leptothrix Ochracea 1000x Magnification
- Truckee Meadows Community College – Microbiology Resource Center: Micromorphology Slides
- Wikipedia: Bacteria
- Wikipedia: Optical microscope
- Wikipedia: Electron microscope
- Wikipedia: Diameter
- Imgur: I Got To Use An Electron Microscope Last Week
- NYTimes: A Tool Gives a New View, Virus-Level, of the World
- Statista: Percentage Of US Population That Own A iPhone Smartphone